
A Tale of Three Marguerites: the Evolution and Alterations of My Favourite Sew Over It Pattern
Sew Over It has been one of the first indie companies I’ve discovered through Lisa’s YouTube videos and have since made many of their patterns. They do really gorgeous dresses, and it’s hard to choose a favourite, but mine is probably the Marguerite dress that came out a couple of years ago. Lisa designed it based on the dresses worn by the character of Marguerite in the movie The Hundred-foot Journey and I instantly fell in love with it.
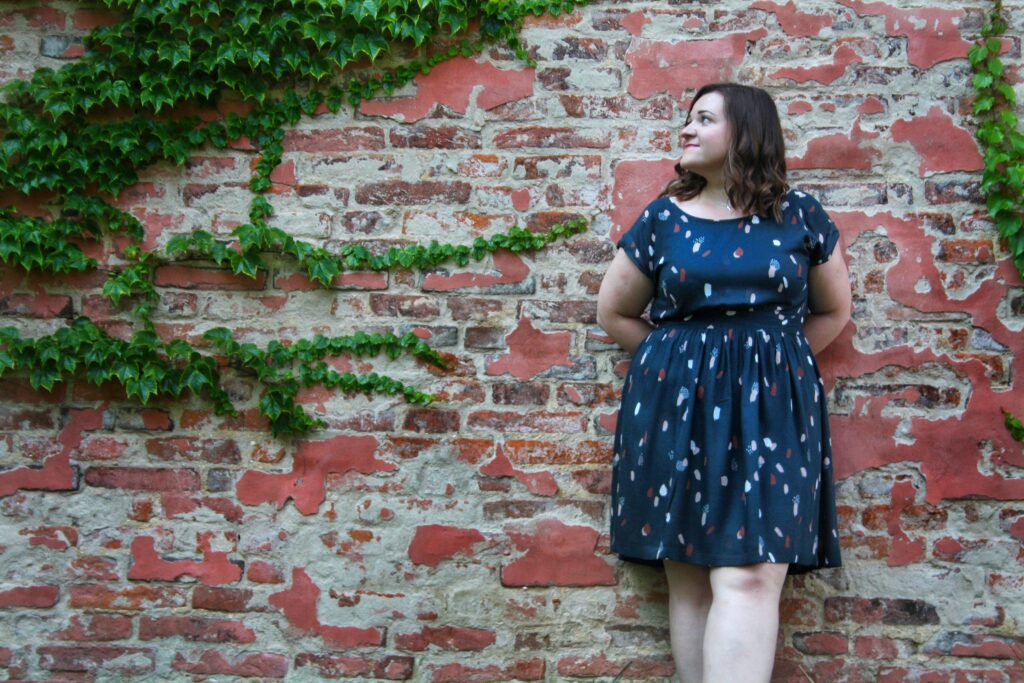
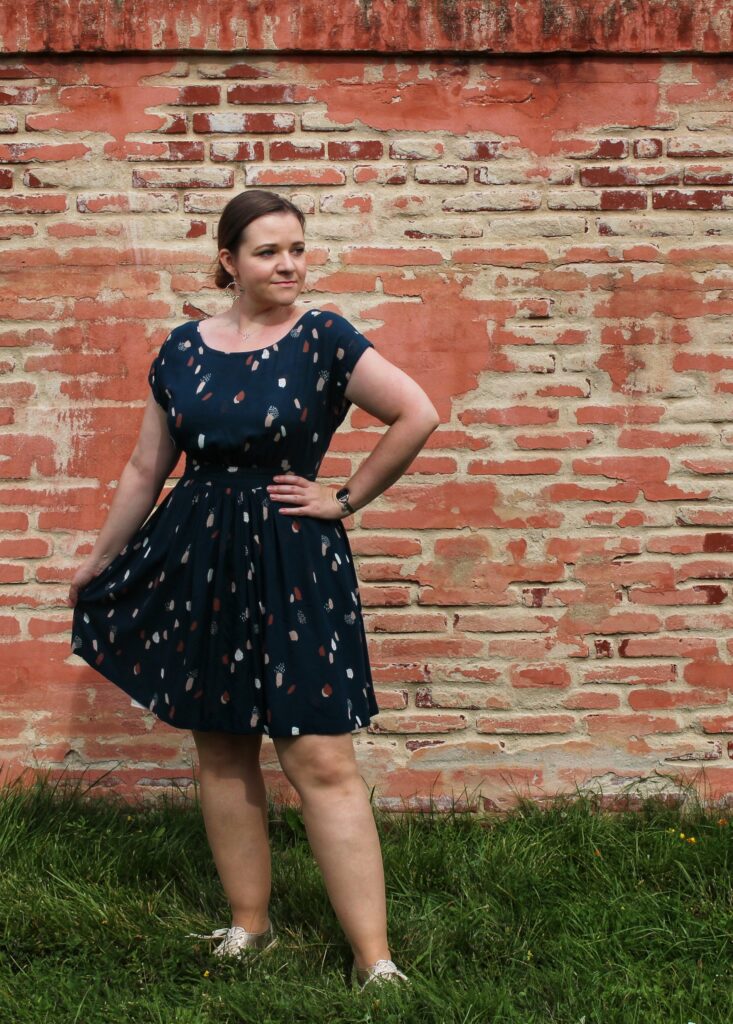
Marguerite dress #1 – don’t skip your toile!
I made my first version soon after it came out in the gorgeous and immensely popular Moonstone Green Atelier Brunette viscose. It was my first time sewing with Atelier Brunette fabrics, so this dress will always be super special to me. I even bought the matching bias binding to hem the skirt with and bias-bind the neckline instead of making the facing, and used the rest to bias-bind the centre-back seam. I french-seamed the side seams and finished the waist-band as well as the bias-binding all by hand, so it is very neat on the inside. The covered button and thread-loop also add a nice finishing touch.
Not even the special fabric, however, made me make up a toile, which was a mistake. I did not think I needed to, as the only fitted part is the waist, but if you look up the reviews of this pattern, you will find that many people had issues with gaping at the back and I ran into the same issue. It wasn’t too bad, so I did not mind it as much at the time and I certainly did not want to take it all apart again, so I left it as it was.
Here are some pictures from when I first made the dress:

Marguerite dress #2 – necessary pattern adjustments
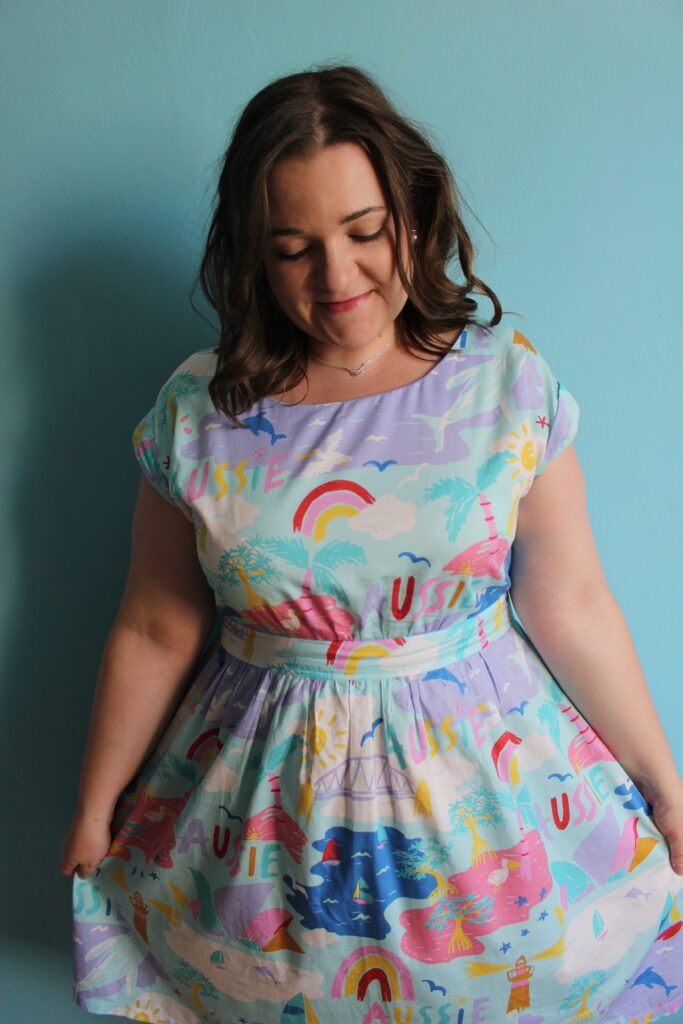
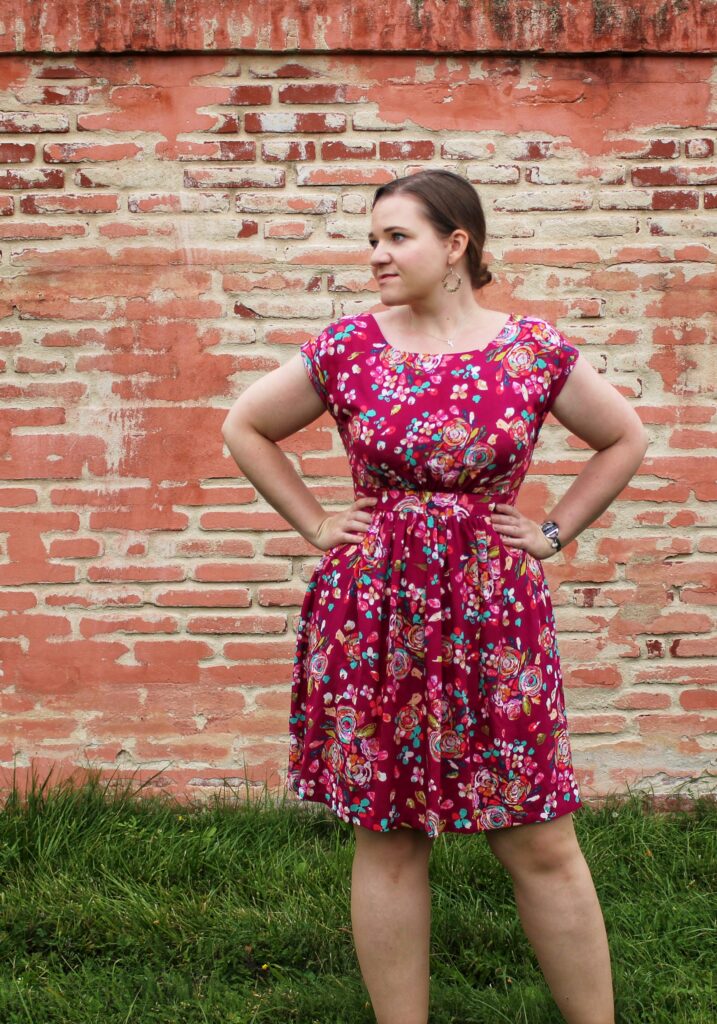
A few months after I bought another super special fabric – the Gone Coastal cotton sateen by the Australian designer Ellie Whittaker as a reminder of my time in Australia. My amazing host family let me have it sent to their place and then my host mum sent it onto me to the Czech Republic to help me save on shipping and customs fees. As the Marguerite does not have too many seams, I decided it was the perfect pattern to let this fabric shine.
I knew I needed to make a few adjustments to my pattern though:
- If you look at the size chart, you can see the dress has over 4 inches of ease at the bust. Wearing my first version, I found that was a bit too much and I preferred a more fitted look at the top, so I went down a size. This also helped with the gaping back a bit and made the neckline less wide (you can see in the pictures above it was nearly slipping off my shoulders).
- I also found the bust point to be a little too high for me, so I lowered it a little. You can use for example this Curvy Sewing Collective tutotial if you’re not sure how to do that
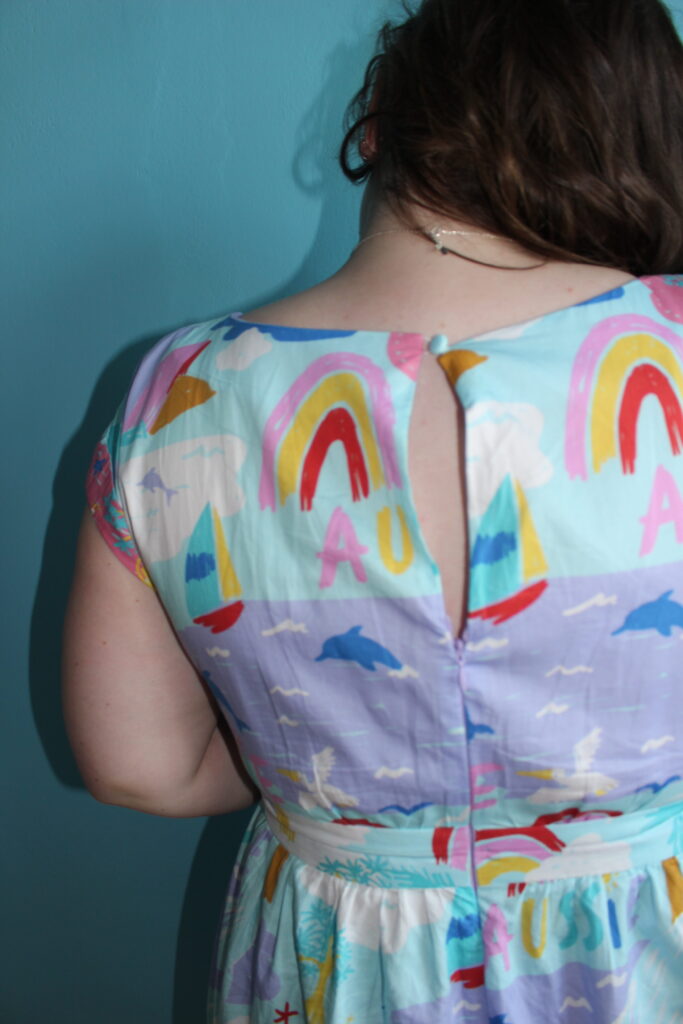
- Finally, the gaping back needed fixing. As I mentioned, the smaller size helped, but it needed a little more work. I did not want to simply take the excess out of the centre back seam, because it would then not be at the right angle to the waist seam. I have no idea if this is correct or not, but it worked for me. I measured on my first Marguerite by how much it needed taking in. Then I drew a line parallel to the centre back seam (about 8cm away from it) all the way down the pattern piece and marked the seam allowance on the waist. I basically did it the way you would for example a narrow-shoulder adjustment, by cutting down the new line all the way down to the start of the seam allowance, and then from the bottom of the seam allowance up towards the start of it, creating a little hinge. Then I overlapped the neckline at the top by however much it needed taking in (half of the total I wanted to take in, as we’re working on half a pattern piece). I drew a rough sketch of what I did below. You will also need to alter the facing piece accordingly.

Having successfully adjusted the pattern, I sewed it up in the gorgeous fabric, this time using the facing to finish the neckline, and it turned out great, if I do say so myself.
Again, here are some pictures I took at the time:
Back to the sewing machine – resizing the dresses
My Marguerite saga, however, did not stop here. Last year I lost some weight and as a result, at one point these dresses just got too big for me to wear. Altering something is my least favourite type of sewing – I’d much rather sew something from scratch! So I kept putting it off, but this summer I finally pulled these two dresses out of the pile to fix them.
Since the cotton sateen version was the more recent one that already fitted much better than the first, I decided to be a bit lazy and just take that one in at the side seams. This meant that I added side-seams to the waistband, which is normally just one piece, but it does not really bother me. If you wanted to see how exactly I did it, you can have a look at this Instagram post and the last slide, which shows it in a short video.

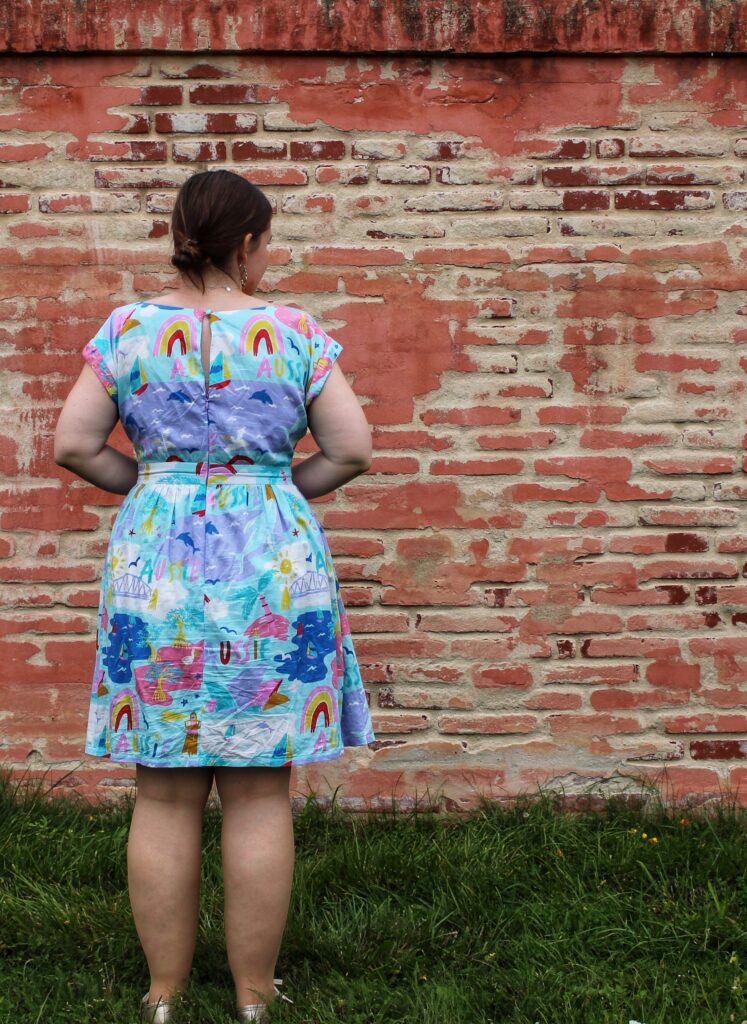
The Atelier Brunette version, however, needed much more work. I had to unpick the bias binding from the centre back seam and back neckline and take the zipper out down to the skirt, unpick the french-seamed side seams, and the waistband. Did I mention how I hate unpicking french-seams? Such a pain… On this one I had to take in the centre-back seam by just cutting off the excess right at the seam and than sewing the zipper back in. I took in the sides and shaped the underarm a bit so as not to have so much excess there with the grown-on sleeve, but it’s still a bit roomy. I cut off the excess at the waist pattern pieces as well and re-sewed it back in.

I think I also did a tiny sway-back adjustment on both dresses, by just marking however much I wanted to take it up at the centre-back and tapering of to the side.
All in all, it was a lot of work, but I love both of these dresses so much and they are so special to me that it was completely worth it.
Marguerite dress #3 – new and improved
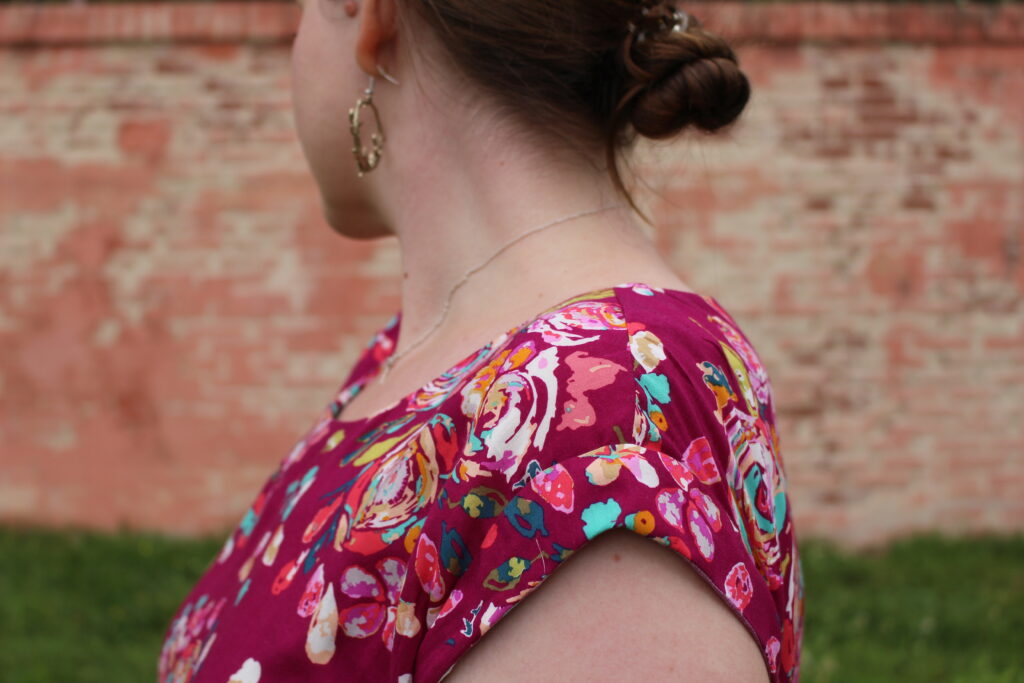
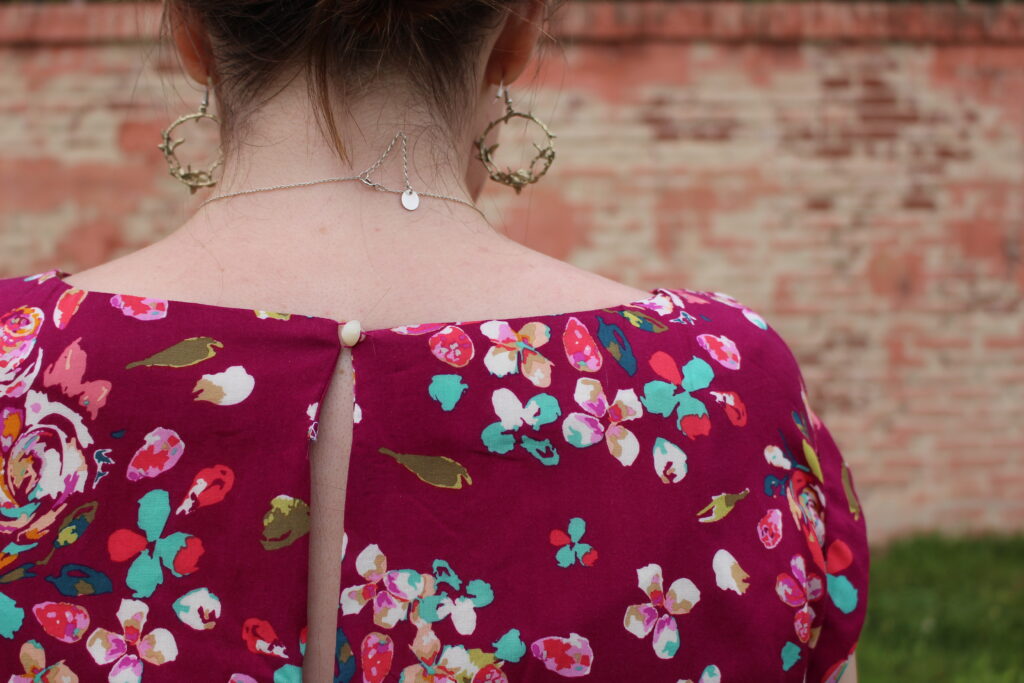
Working on them has reminded me how much I loved the pattern and I had a fabric in my stash which I always intended to use for another Marguerite. It’s a magenta floral rayon from Art Gallery Fabrics, which is similar to the fabric of my RTW dress that I’ve had for about 8 years. It has a similar shape to the Marguerite, with the gathering at the bust and gathered skirt and cap sleeves (although the RTW dress has raglan sleeves rather than the grown-on sleeve of the Marguerite). So I thought it was time to sew it up.

Of course, I needed to retrace a smaller size of the pattern and do the adjustments I did before, taking the altered versions as a guide, but it did not take much time. As I’m away from home, I can’t look at which size I traced, but I think I traced the 14 for the top pieces, and cut the waistband the same length as the the altered dresses. I did not bother retracing the skirt, because the excess fabric would get lost in the gathers, so it was just the top that needed retracing. Out of the three, it is definitely the best and closest fitting version, which I like. I have since wondered if the shoulder seam was in the right place for me, so if I make another version, I’ll have to think about it and might need to move it forward a bit, as the alterations to the back neckline probably pulled it backwards.
So there we have it, three versions of the same pattern and each fits differently as a result of the different alterations it went through, but all three are now wearable. That’s the pleasure of sewing your own clothes and having the skills to alter them to fit you even if your body shape changes.
If you’ve read this far, thank you for your patience and I hope it was at least a little bit useful to you! Have you tackled any alterations lately or are you hiding your alterations pile in the corner of your sewing room? Let me know in the comments.
Till next time,
Magda


You May Also Like

Back wrap dress tied with a bow: A Sew Over It Molly top hack

More flowers and v-shaped back necklines: Burdastyle summer dress
