
How I made my reversible Liberty quilted jacket of dreams: tips & tricks
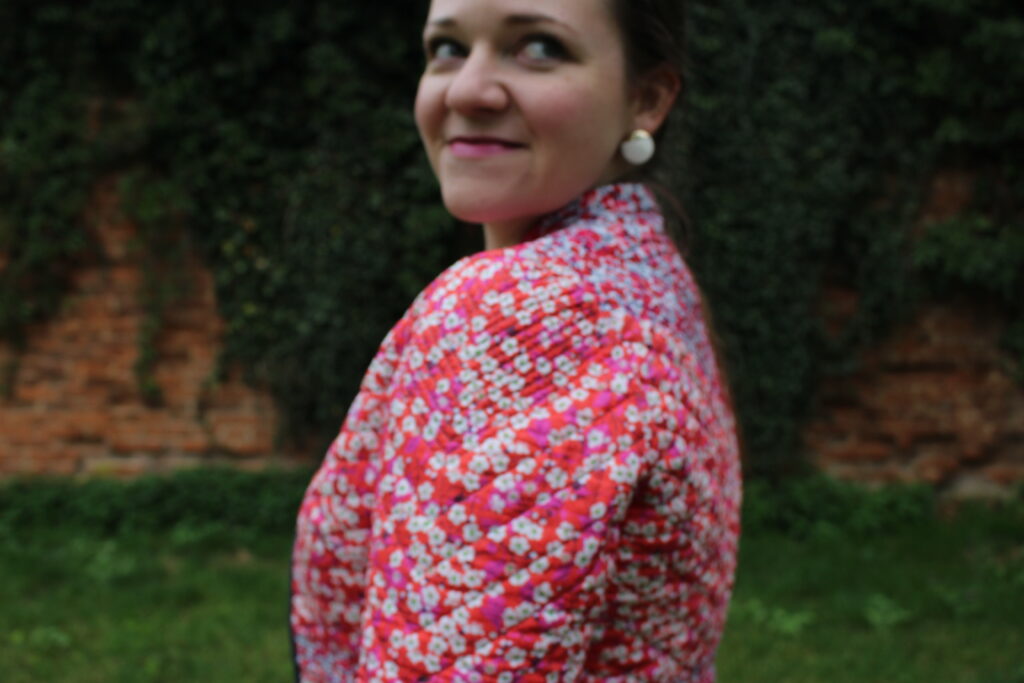
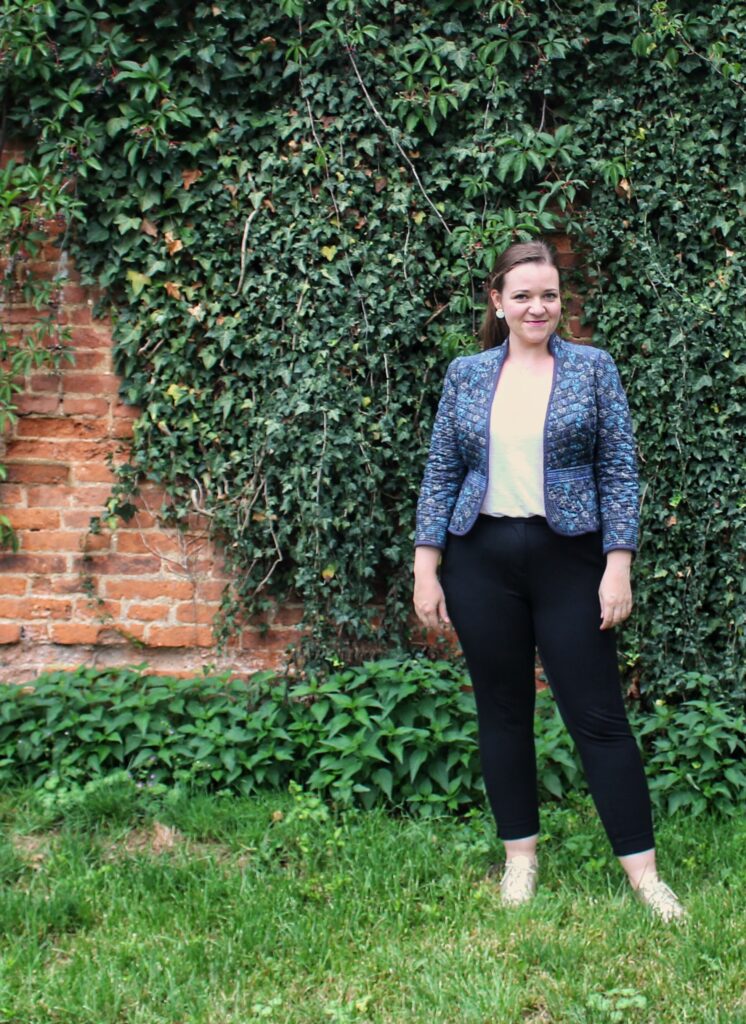
Many years ago, when I was living in Durham in the north of England, courtesy of the Erasmus programme, I remember walking into Monsoon for the first time and falling in love with their colourful quilted jackets embellished with beads, sequins, and embroidery. But they were way out of my price range. I’ve been dreaming of making a jacket like that for myself for years, collected precious bits of Liberty fabric, and here we finally are. As you can see, in the end I left off any embellishments, as I thought it was already statement enough, but one day I’ll hopefully make another jacket which will be even more colourful…. But back to the jacket at hand!

1/ Choosing a pattern
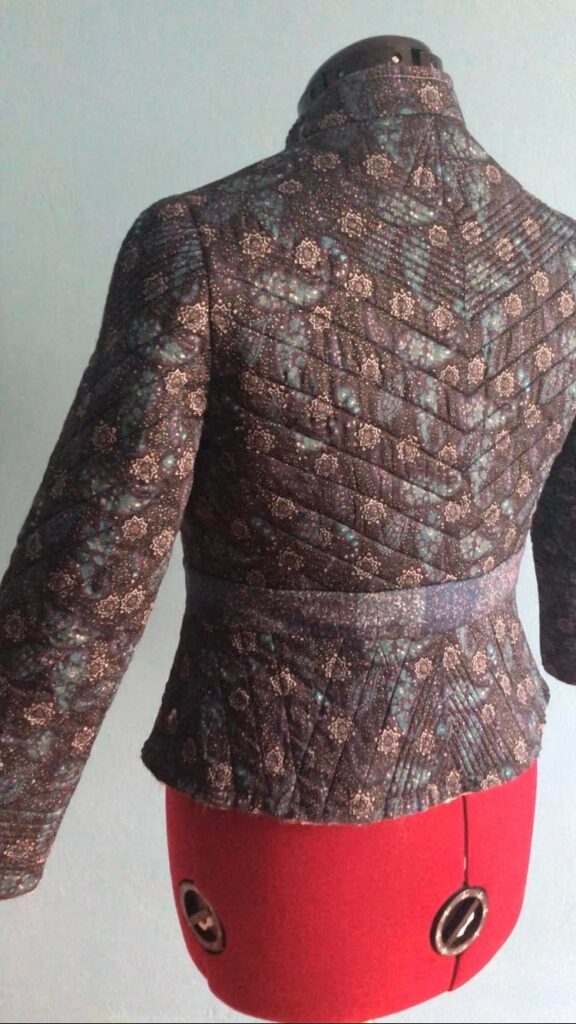
Usually, quilted jacket patterns have as few seams as possible and no darts, to minimise bulky seams and to make the quilting easier, like the popular Megan Nielsen Hovea or the Grainline studio Tamarack. However, I wanted something fitted with a defined waist, so I reached for a blazer pattern from the 04/2018 issue of Burdastyle, which has princess seams combined with a tiny bust dart, a midriff panel, and panneled peplum – elements that would discourage many people from trying to quilt it. Not me! I was determined to make it work.
To check the fit and make design and fit alterations, I made a toile. Surprisingly, it fitted well, I only had to do a narrow shoulder adjustment. Designwise, I decided to make the blazer much shorter, omit the lapels (basically by cutting it off at the fold line), raise the collar stand a little bit, and omit the closure.
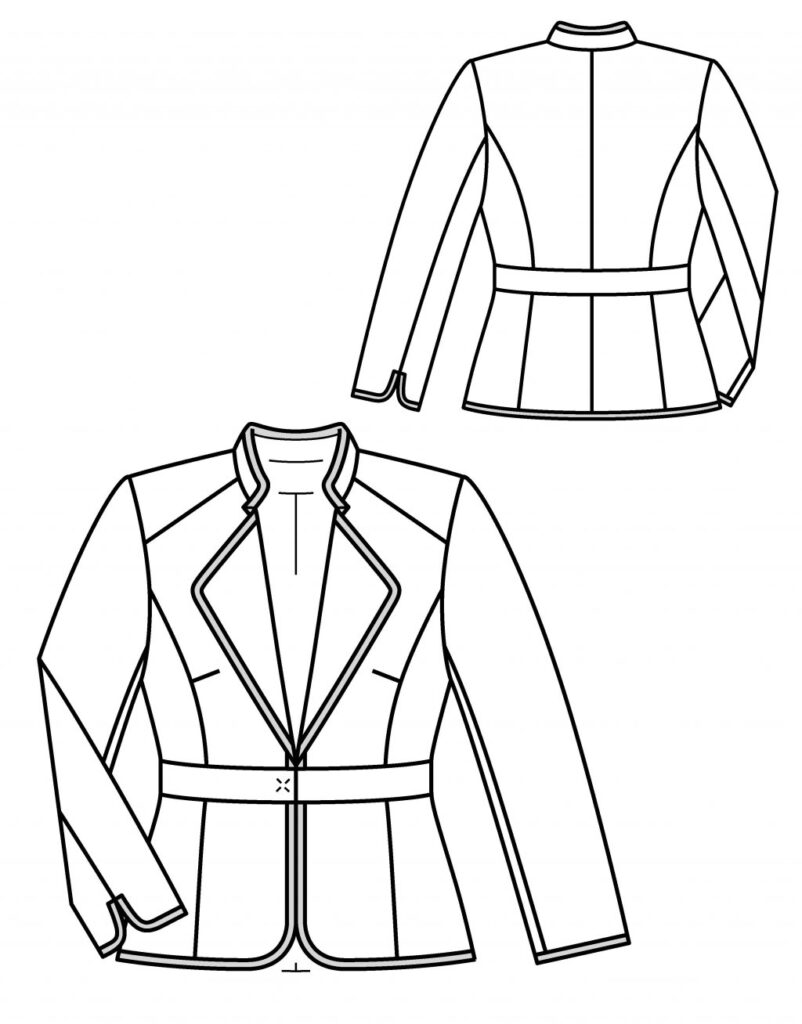

Image on the left is from the burdastyle.cz website.
2/ Choosing fabrics
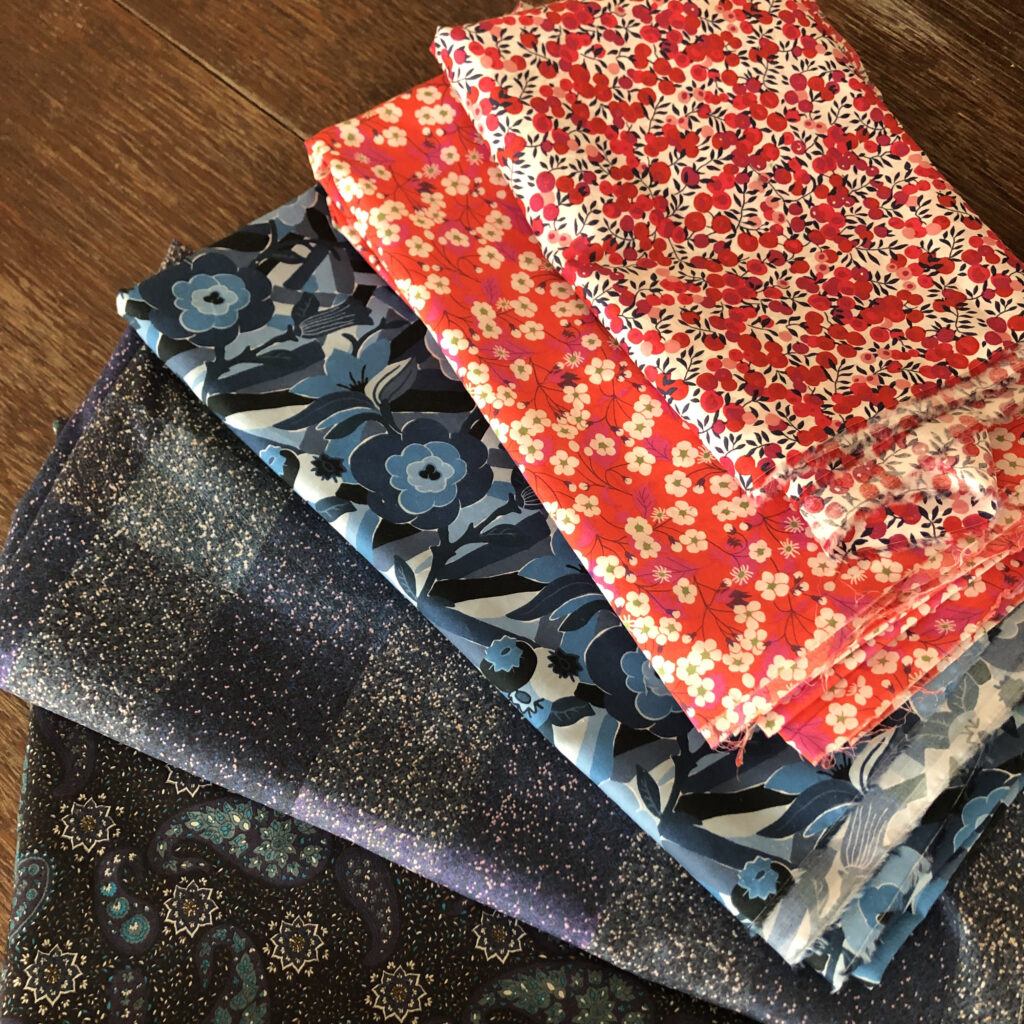
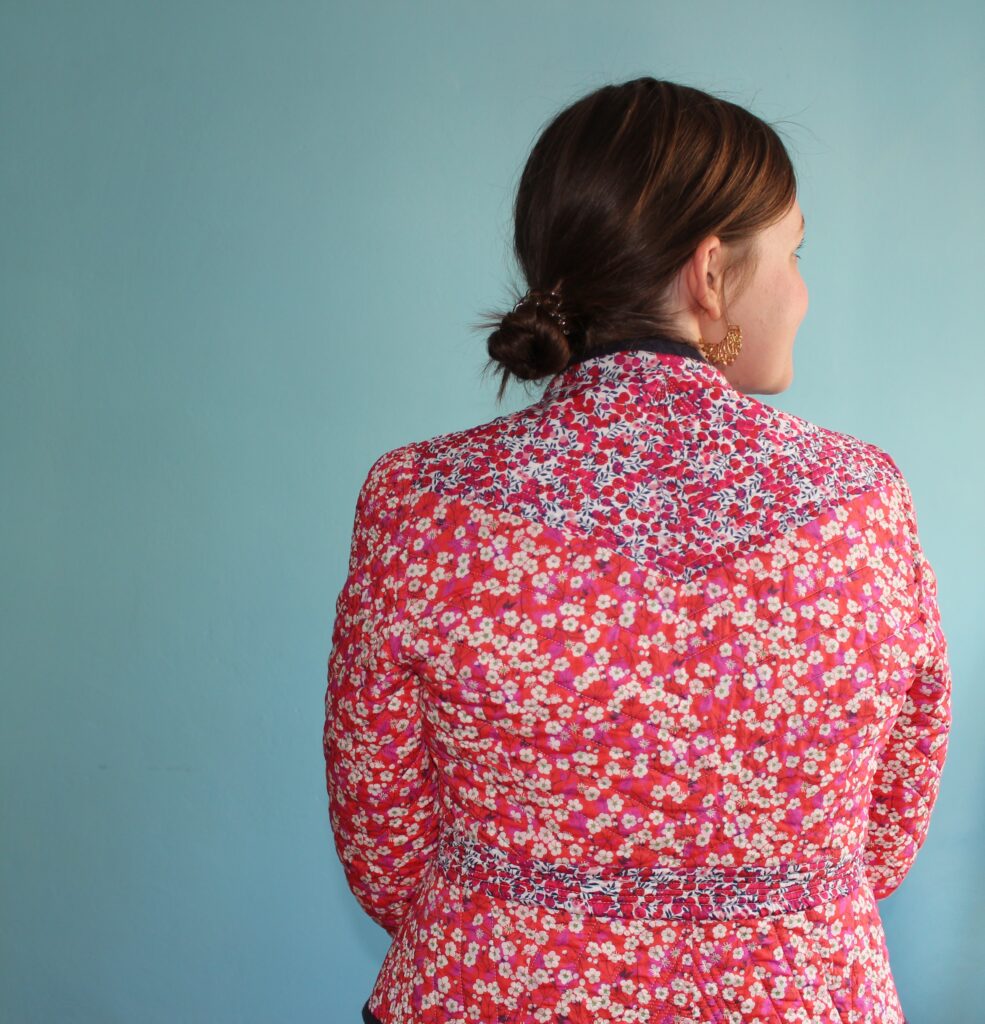
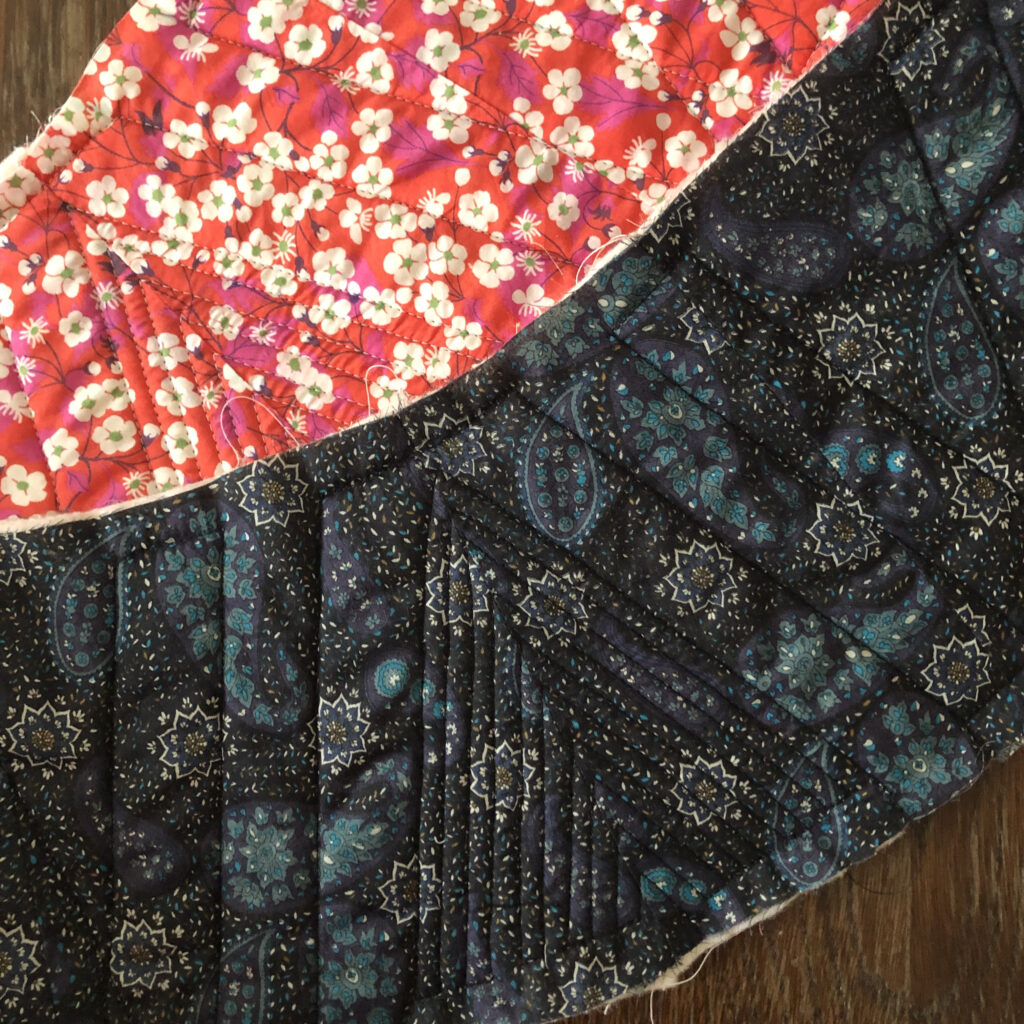
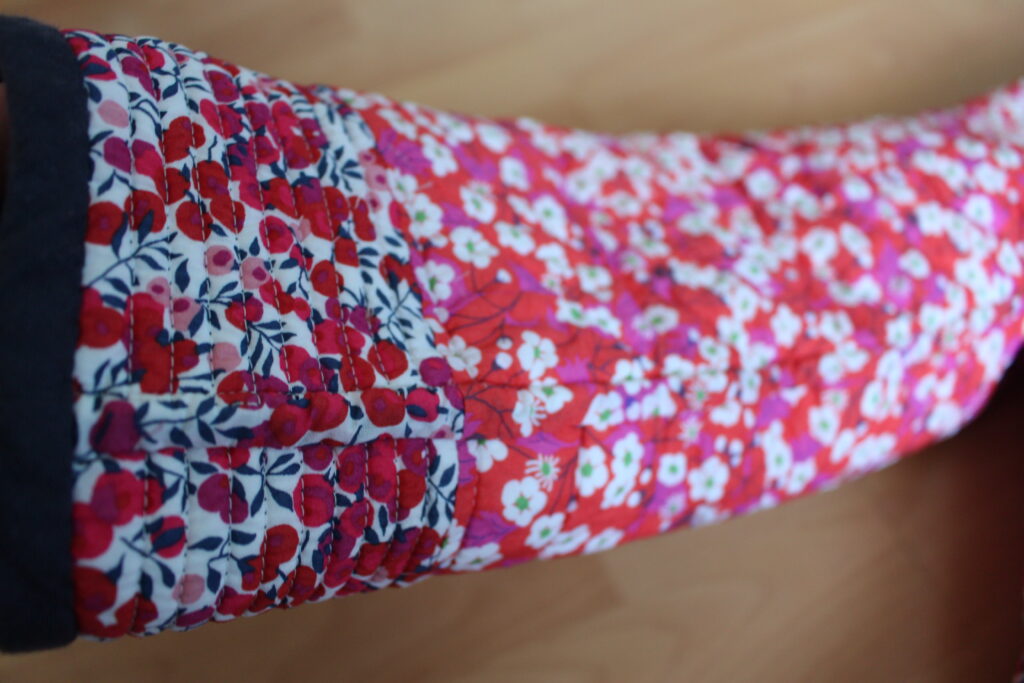
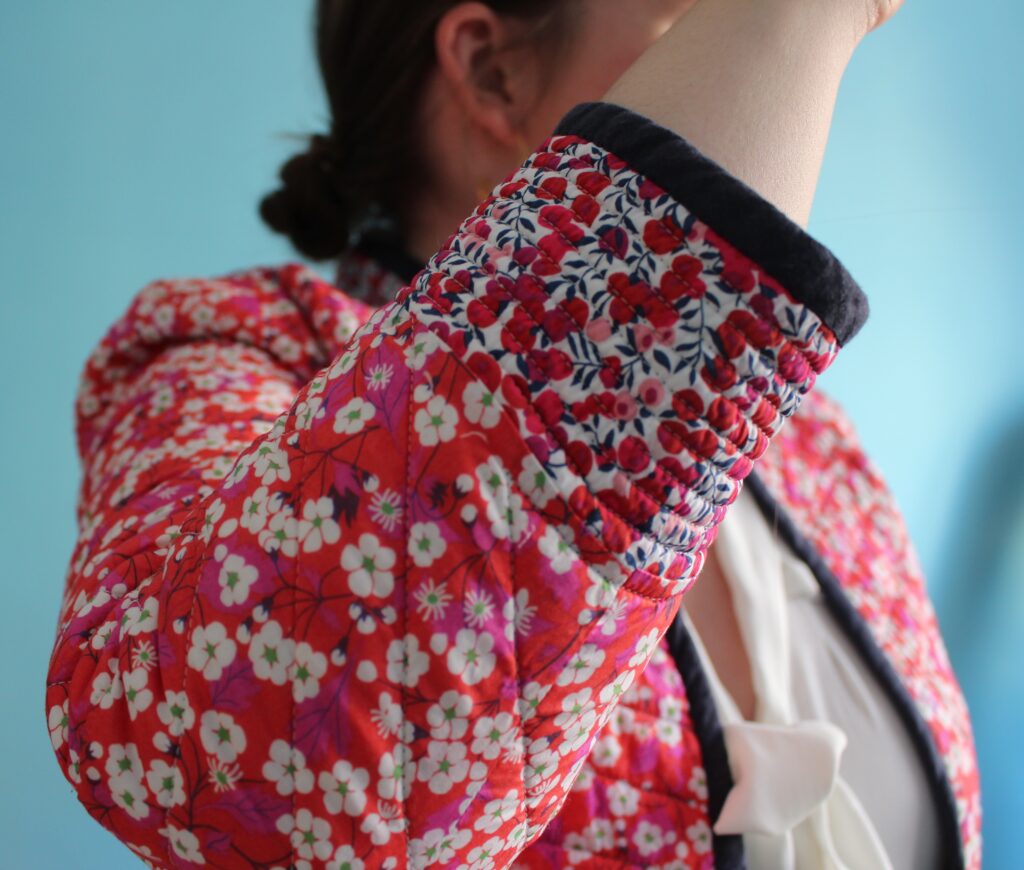
When I had my pattern ready, it was time to choose my fabrics. I had a little stash of Liberty tana lawns I collected over the years just for this purpose. It was just a matter of deciding whether to use them all, and what pieces to cut out of which print. I played around with lots of combinations, but in the end went for making one side of the jacket a bit more restrained combining two navy prints – a paisley with stars for the majority of the pieces, with the midriff piece and shoulder yoke cut from a sort of dotted check print – and the other a bit more loud in reds and pinks – the Mitsi print for most of the pieces, combined with remnants of my all time favourite, the Wiltshire berry print, which I used again for the midriff and shoulder yokes, as well as for the bottom of the sleeve and a triangular yoke I added to the back.
3/ Cutting out the main fabrics
As I knew I wanted to finish the edges of the jacket with bias binding, I did not add any seam allowance on the top of the collar stand, the centre front edges and the hem. Otherwise I cut everything out with a 1.5cm seam allowance. I cut out all my pieces for the navy side and the red side (which had extra pieces, as I split the back into two by adding a yoke, and the sleeve as well by cutting out the bottom in contrast fabric).
4/ Assembling the main pieces & batting
With quilted jackets, they are often cut from fabric which has already been quilted. I did not want to do that, because I wanted to play around with the quilting following the seam lines, and because the number of seams would mean there would be too much bulk. Instead, I decided to assemble the main parts of the jacket first, then quilt it, and then seam the remaining pieces. So I sewed the top left and right bodice pieces together, I sewed the top back pieces together, all of the peplum pieces, and also the one outer seam on the two piece sleeve.
Now, I am sure you’re wondering why I haven’t mentioned cutting out the batting yet – that’s because I only went to cut it out at this stage, because I wanted to eliminate all the seams that I have just sewn on the main fabric pieces on the batting to minimise bulk. I used a thin cotton batting. With the peplum piece, the cutting out was easy, I simply laid the assembled peplum on the batting and cut around it. The top pieces and the sleeve pieces had shaping, so I could not do that. Instead what I did was to cut the pieces out without any seam allowance on the inner seams (the ones I sewed together in the main fabric) and cut out the dart. Then I simply laid the edges without seam allowance that I wanted to seam together and seamed them with a zig-zag stitch, resulting in a flat seam. Then I also cut out the collar stand and the midriff band.

5/ Quilting the main pieces
Now for the fun part – quilting! My top tip for this stage is to use this magical spray adhesive for fabric from Prym, which I used to stick my fabric pieces onto the batting. It doesn’t dry right away, so you have a bit of manouvering space to smooth everything out, and it washes away with water. It stops the layers moving and prevents puckering as you’re quilting the layers together. I used this to sandwich all my pieces except for the belt and collar stand.
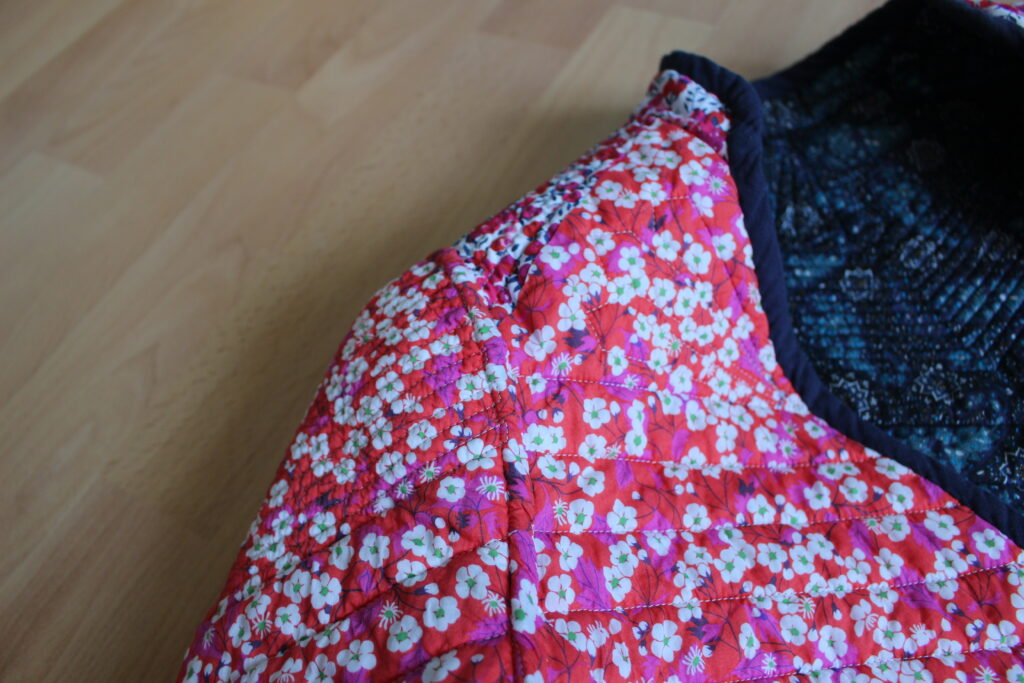
Once I stuck all the layers together, it was time to decide on how I would quilt them. In the end I went for straight lines mostly following the seam lines, changing the spacing between the lines – closer on the yokes and bottom of the sleeve and wider on the main pieces, and then a couple of ornaments on the yokes. I drew the lines with a water soluble marker, so it would be easy to remove.
For the quilting itself, I recommend using a walking foot, if you have one, as it helps to move the fabric sandwich evenly through the machine. Use a longer stitch for nice lines, I think I used 3 or 3.5mm. Because one side of my jacket is navy and the other pinky red, I went with navy thread in the bobbin and light grey for the top thread. I had to play around with the tension a bit to make sure the other thread was not being pulled to the reverse side, but once I tweaked that, it worked great. I tried not the quilt past the seam allowance.

6/ Assembling the remaining seams
Because I wanted to make the jacket reversible, I decided to go for something like faux flat-felled seams for the side seams of the bodice, sleeve, and the armhole. That is why I tried not to quilt into the seam allowance, but it did not always work out. So in hindsight, I should have drawn the lines of the seam allowance on the fabric and be more diligent. Because I wasn’t, I had the extra work of unpicking some of the stitches.
So, here are the steps I followed. I’ll try to describe it both with words, but in case that’s not clear, they are accompanied by pictures. As a first step, (after potential upicking) you sew the two pieces together as you normally would with your seam allowance.

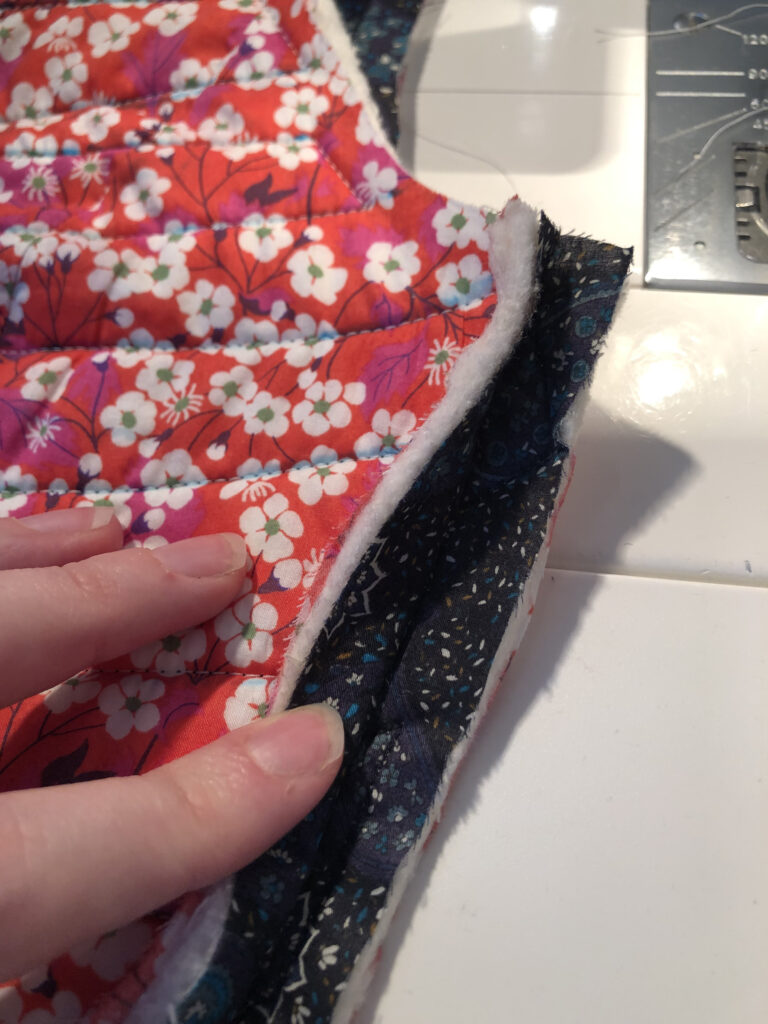
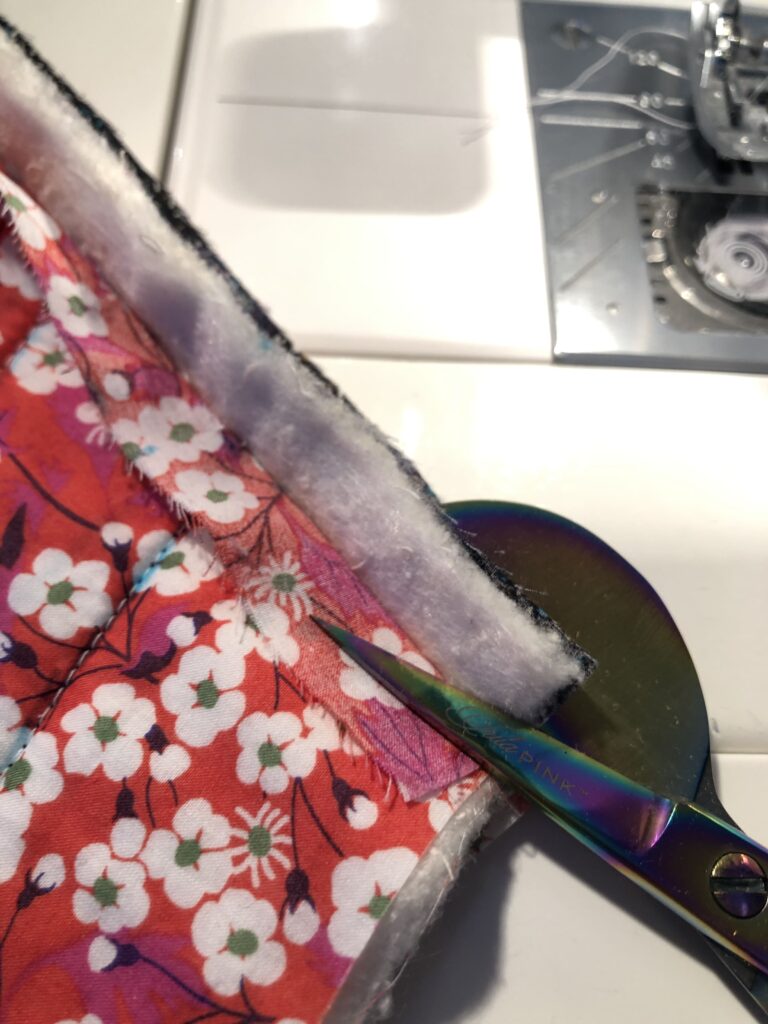
Then you trim the batting and outer (navy) fabric seam allowance as close as you can. If you’ve glued the layers together, you will have to peel them off, but it was easy. Next, you trim by half the seam allowance of the inner (red) fabric on the side to which you want to fell your seam.

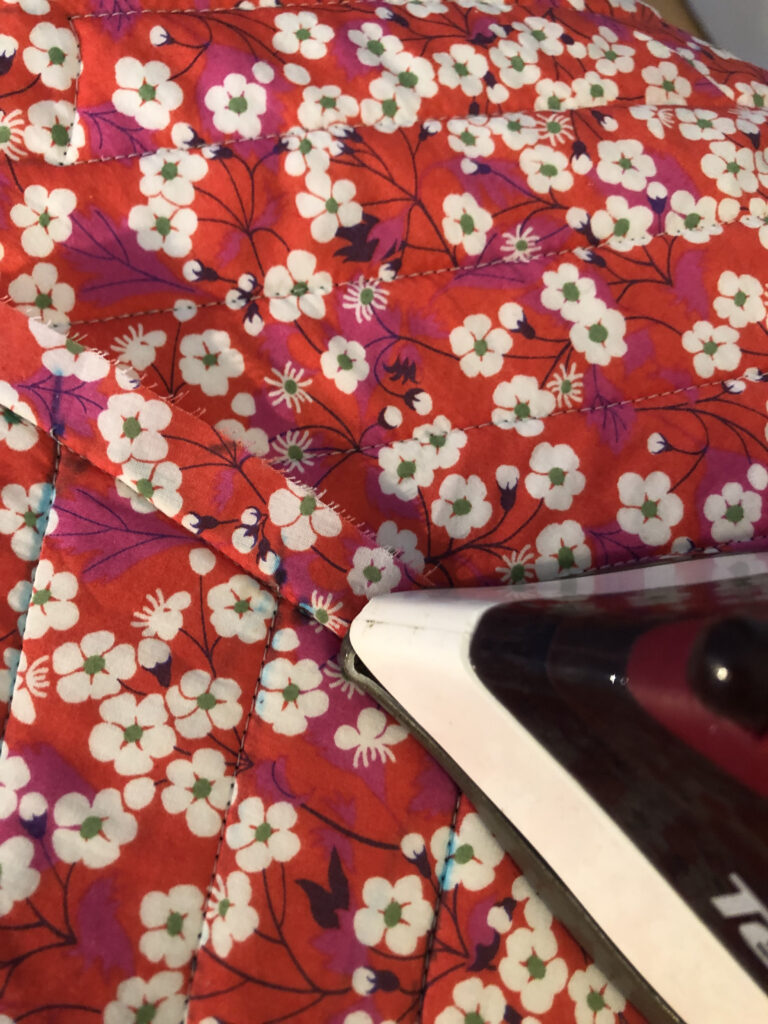
Then you iron the untrimmed seam allowance towards that side and fold it under to cover the trimmed seam allowance. Then you pin it in place and hand stitch with an invisible stitch.
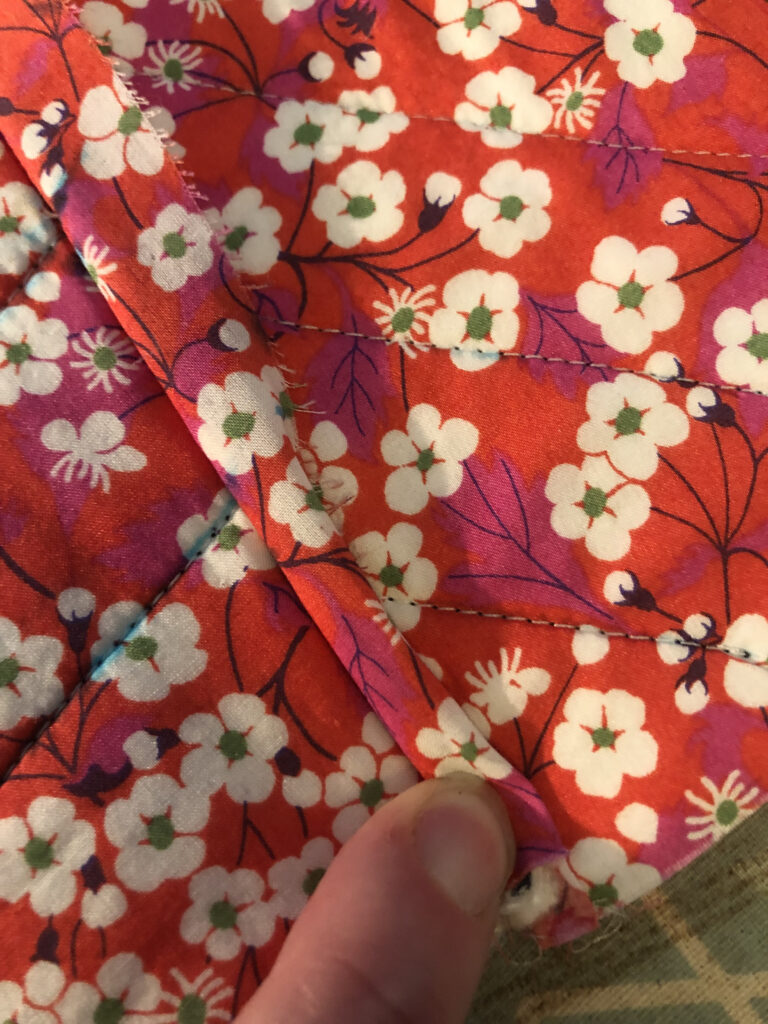
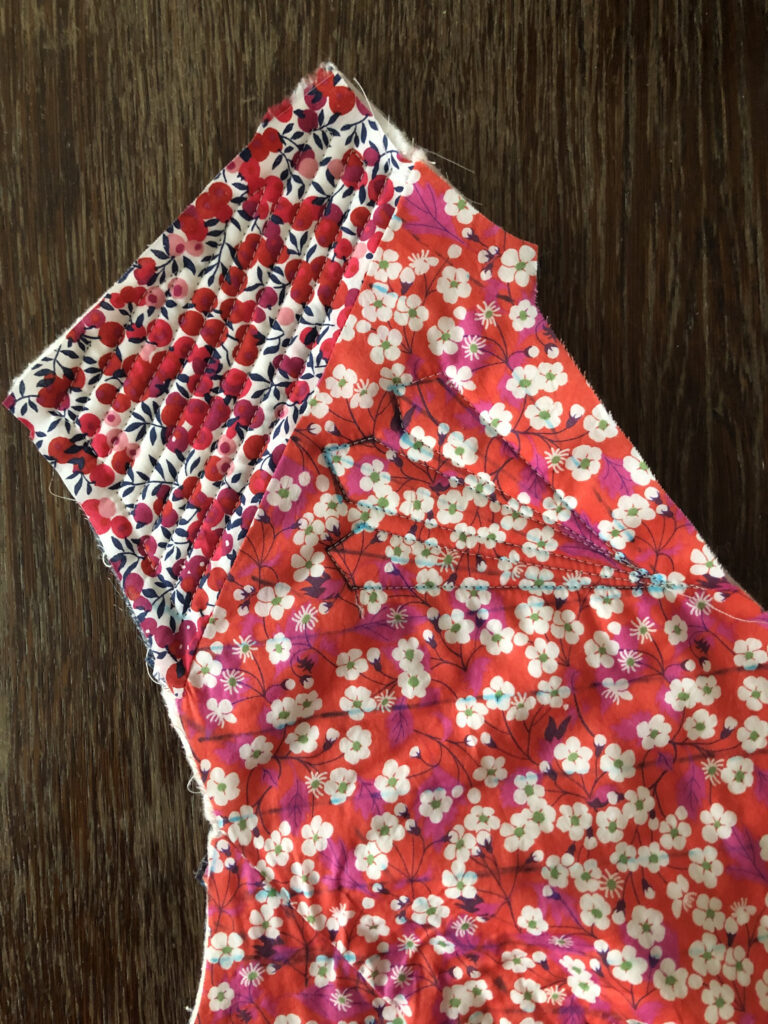
Here’s what the finished seam looks like. Pretty neat, if I do say so myself!
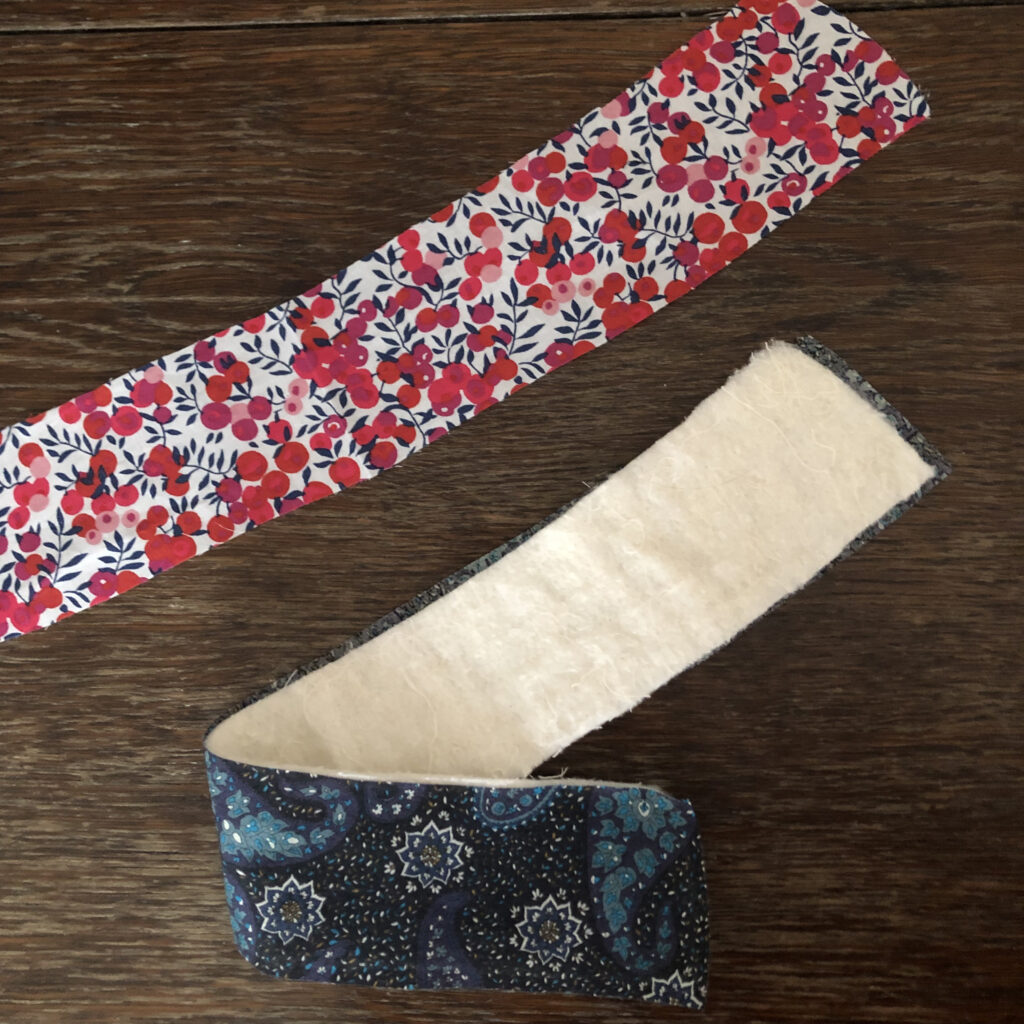
With the bodice seamed and sleeves inserted, it remained only to attach the midriff piece and the collar stand. I glued the navy fabric to my batting on both the collar and the midriff piece. To attach the collar, I laid the navy piece with the batting right side to right side with the navy side of the bodice, and the pinky red piece right side with the pinky red side of the bodice, and attached it, pressed it up, trimmed the seam allowance and basted the layers together at the top of the collar. For the midriff panel, I attached it as you normally would attach for example a lined midriff panel on a dress – I first sandwiched the bodice between both midriff panel pieces and sewed them together. Then I attached the navy midriff panel to the peplum, trimmed the seam allowances, and then handstitched the bottom of the pinky red midriff panel on the inside. Then I quilted it together.
7/ Finishing the edges
With the whole jacket assembled, all that was left was to finish the edges. In the end, I decided to go with navy cotton bias binding. I attached it to the navy side, folded it towards the other side, and handstitched in place.
Final thoughts
This jacket was a labour of love that took me a lot of time. There was a lot of handstitching and lots and lots of quilting, but I loved every minute of it. What I might have done differently is adding a little bit of room. While the toile fitted just as I wanted it to, the because of the quilting the final pieces are a tiny bit smaller. I knew that that’s what happens when you quilt things, and it’s not really much of an issue, the jacket still fits, but a tiny bit more room would probably be nice. Overall, I am super pleased with the result and with finally utilising my Liberty stash.
Please let me know if you’ve made a quilted jacket too, or if it’s something you’d want to tackle. If so, I hope you have found this post useful.
Until next time,
Magda


You May Also Like

One Sewing Pattern Three Ways: My Obsession with The French Poetry Leo Dress

Tie the ties: Liesl + Co. Belgravia dress in festive red
